Today I finish up 2006 (in the history of my garden) with three projects and lots of photos. I've already talked about clearing the space by having trees removed, then building the patio. The first project I'll talk about today is the main staircase to the patio.
This one was tough to design, since I had never really designed a stairway before, and it's important that it's easy to use without feeling awkward. The last thing I wanted was to make the trip down to my nice new patio scary or dangerous. So I did a lot of planning.
It turns out that there is a well-used formula for determining the "rise" (height) and "run" (depth) of each step so it will feel natural. The formula is 2R + T = 24" (although it's also written with a range of 24"-27") where "R" is the rise and "T" is the tread depth (depth of each step). What this means is that if the tread depth was 10", the rise of each step would need to be about 7", so 2x7 + 10 = 24. (This formula seems to have originated in the 1700's based on the typical human stride. I'm not sure I understand the logic behind it, but it works.)
What I also realized was that there was no way to make a single comfortable staircase that covered the height I needed in the space I had. So I put a small landing in the middle of the staircase. This was very fortunate, as I can't imagine the staircase today without this landing. It's perfect.
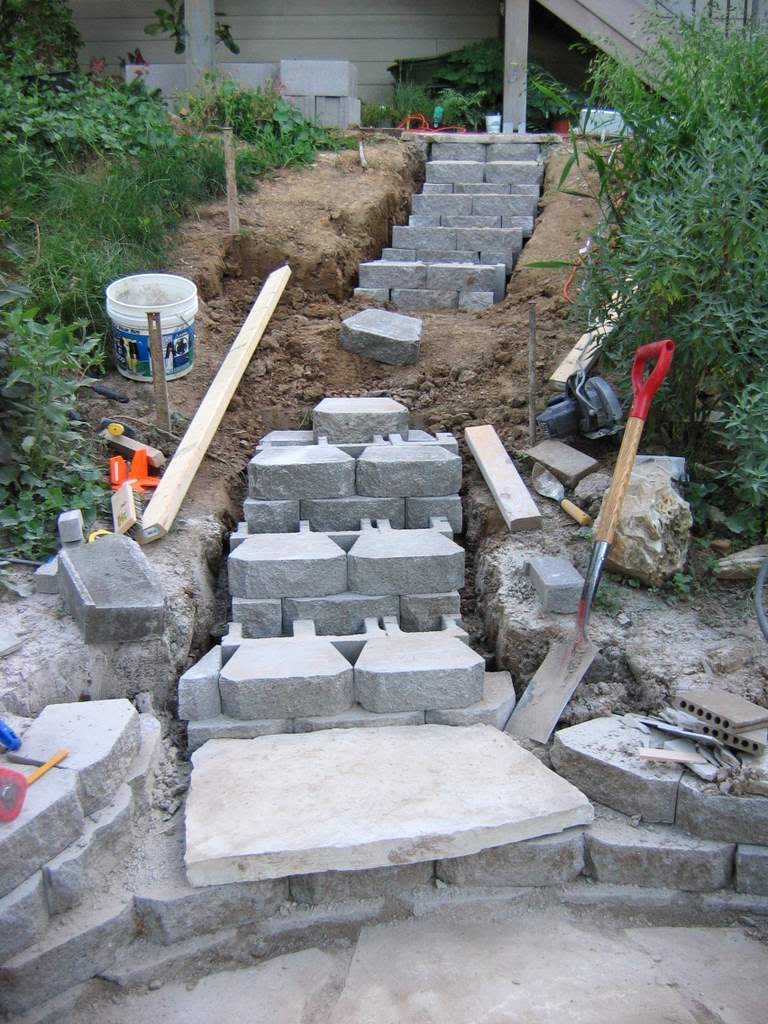
It was important to me that the stairs were very solid, so I decided to use cinder blocks for the main structure, combined with the retaining wall blocks I used around the patio. I ended up having to cut notches in the backs of each cinder block so they would fit together correctly.
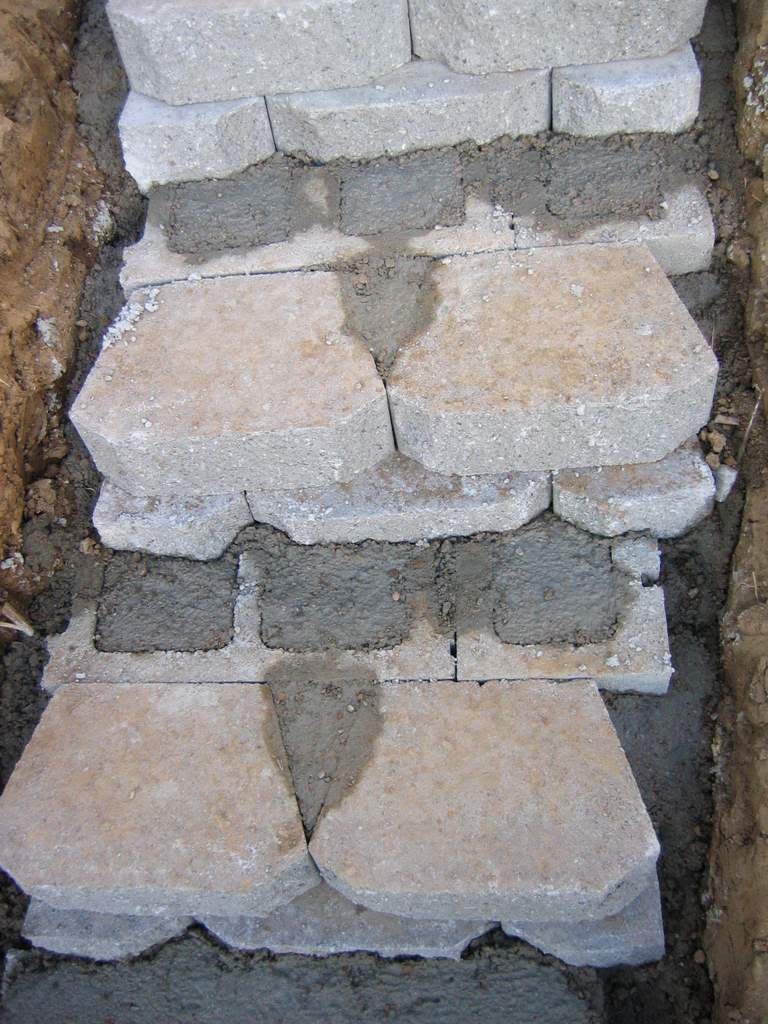
Then I filled all of the spaces with concrete to lock them together and give everything even more mass:
Here's the landing. It was treated just like the patio, with a base of compacted "minus":
The stair treads would be capped with composite decking material that was leftover from the construction of our new deck (I hired somebody to do that project). Here are a couple of sample pieces, as I didn't take any photos of that part of the process:
This staircase is probably the structure in my garden that I'm most proud of, as it was a nice piece of learn-as-you-go engineering and turned out so well.
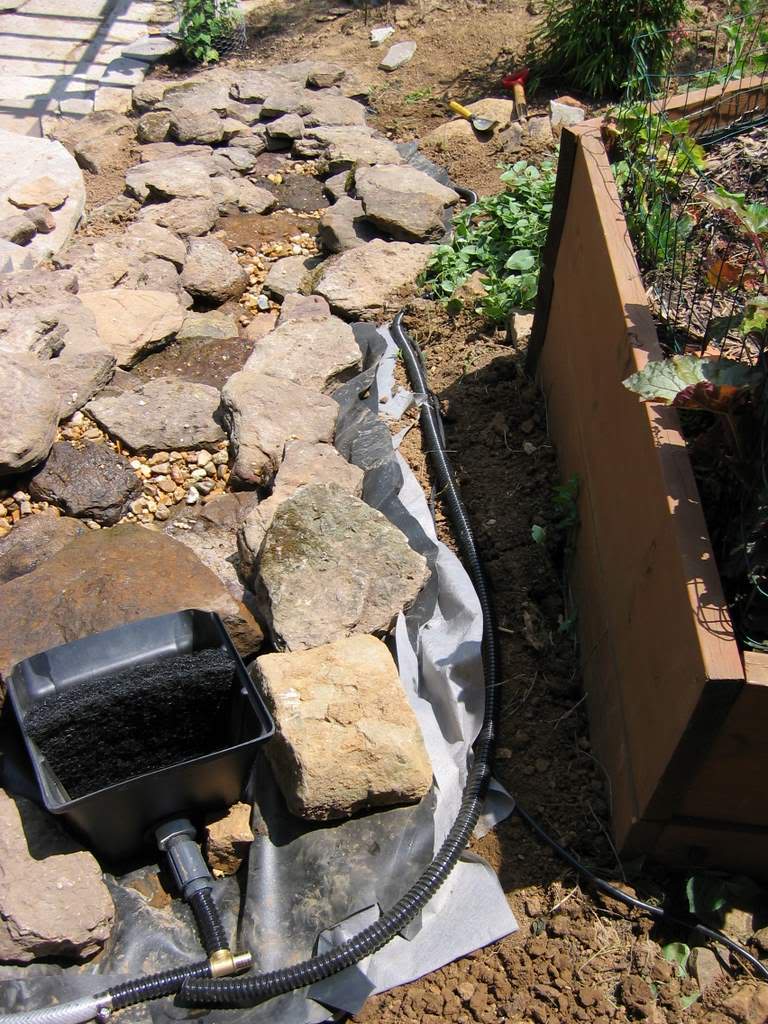
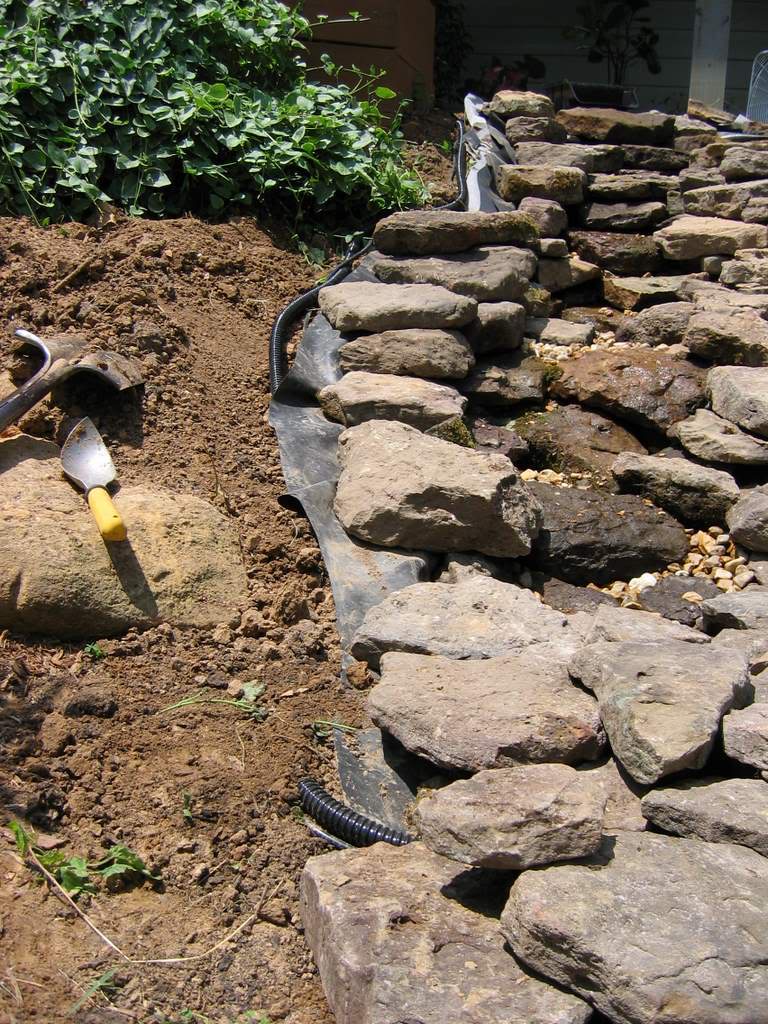
Next up was the area next to the stairs, where I wanted to build a "stream". I didn't really photograph the construction of this, but it involved me ordering a bunch more stones (yeah!), digging out the "channel" the stream would follow and the space for the reservoir at the bottom, laying down the rubber liner, running the hose, then adding all of the rocks.
I had never done this before, and although it turned out quite well, there are a couple of design flaws that will force me to dismantle and rebuild the stream bed at some time -- possibly late this winter. Anyway, here are the photos I did take:
That's all I have, so let's just jump ahead to the almost-finished product which shows the completed stairs and stream:
It looks nice (and sounds fantastic!) but at this stage it seems kind of bland. As you can see I left plenty of spaces between the stream and the stairs for plants -- my goal was to have the stream look like it's been there forever, and plants are the way to make it blend into its surroundings.
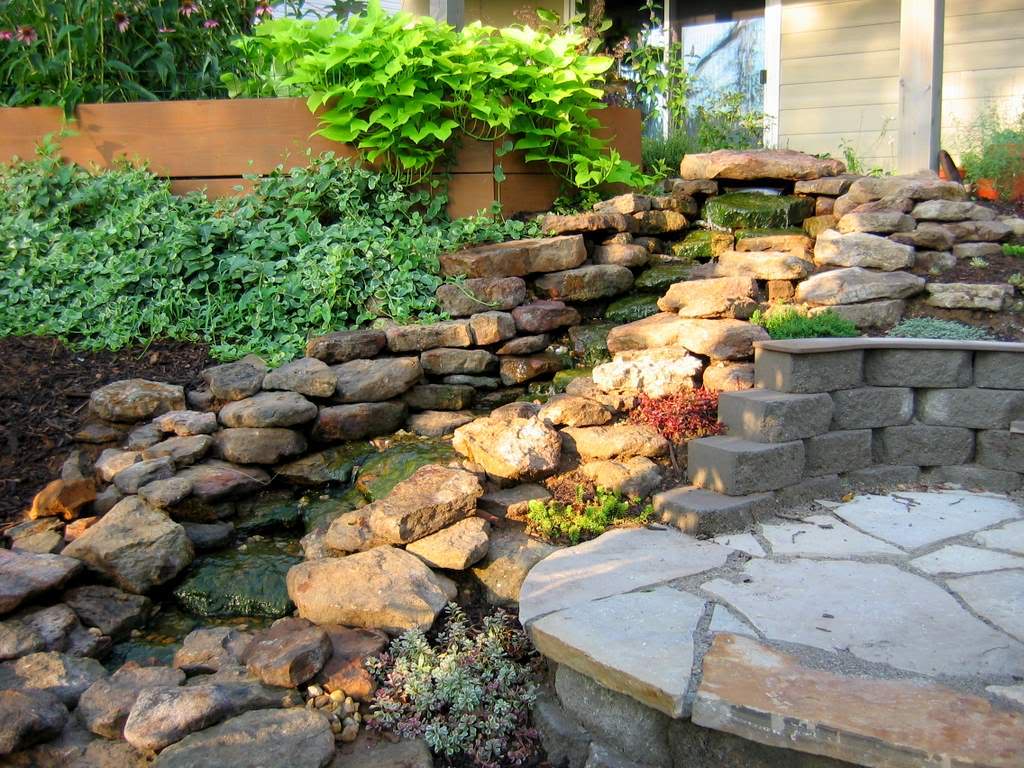
So I planted some thymes and sedum into the nooks. A few months later, it looked like this:
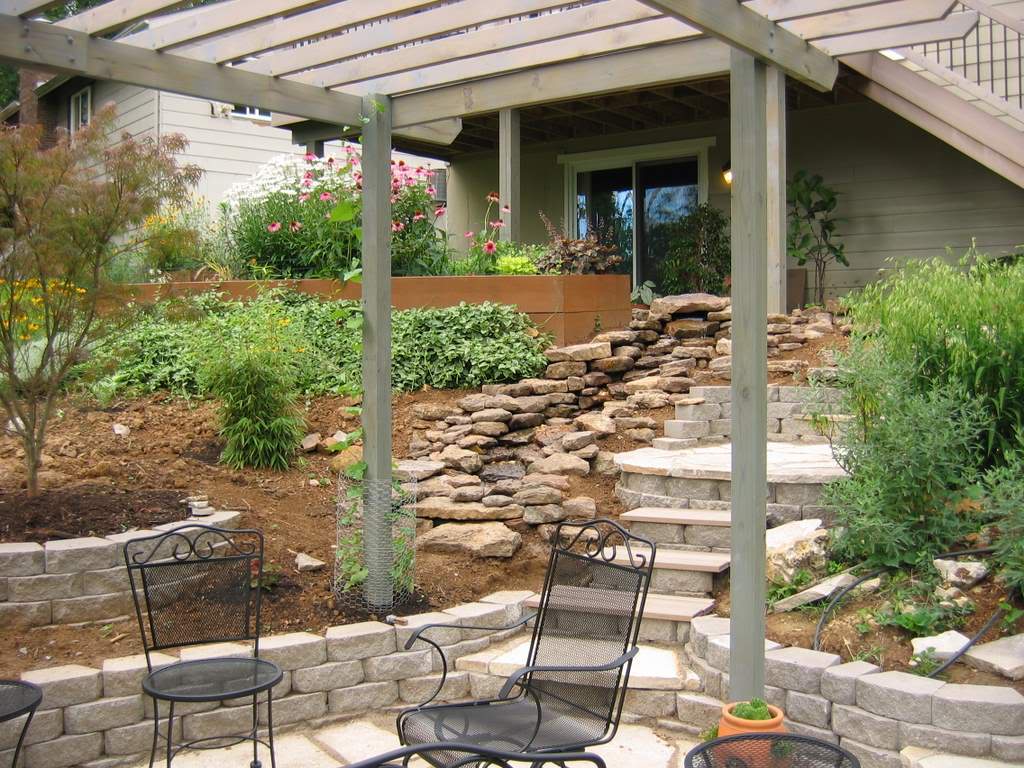
After a couple of months of further growth, it's as if the patio, pergola, staircase and stream had been here all along:
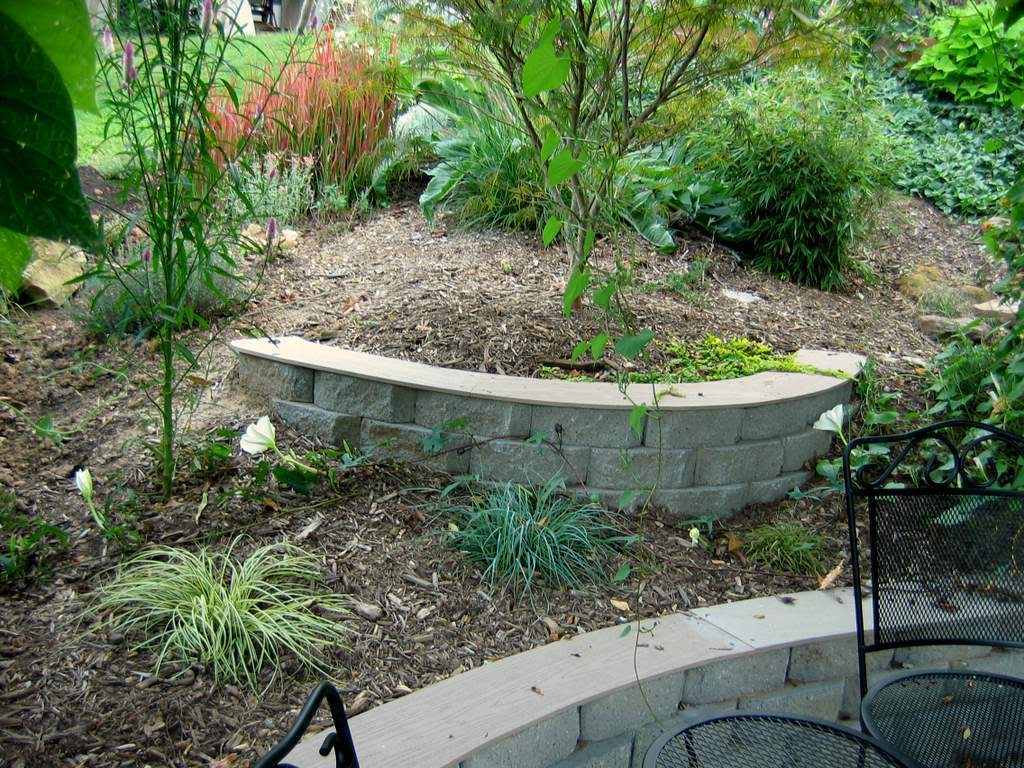
One thing you may have noticed is that at some point during the summer I topped off the retaining walls. If the staircase is my best project from an engineering standpoint, the retaining wall top is probably my best from a creative standpoint.
In addition to having a few decking boards left over from the work on the new deck (used for stair treads), I had a few of the "fascia" boards left over too. They were a composite material like the decking, but were thinner and wider. My idea was to cut them into the curvy shapes needed to match the retaining walls:
This provided not only a nice surface to sit upon, but looked great! Since I used the same materials, it also tied the patio in with the deck, which helps to harmonize the entire garden.
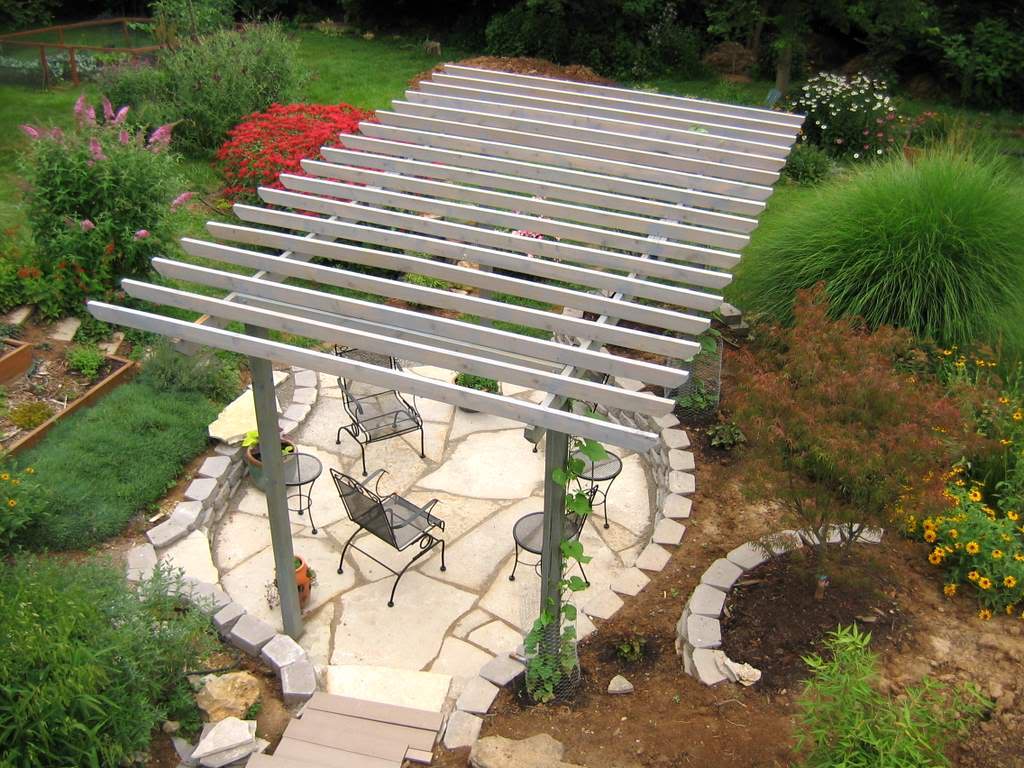
Here's what the smaller pergola looked like too:
And since we're looking at vines on structures, I also made a trellis out of copper pipe and plumbing supplies this year (2006), and put it on the side of the house where the three small boxes are:
I felt like a vertical element was really needed over here, and I think it works quite well. I've still not found the ideal flowering vine for this spot though.
And that concludes 2006, the year of construction in my garden. We're almost all caught up now, but next is 2007 -- the year of bamboo. Stay tuned.











I realized after posting this that I referred to 3 projects, but didn't clearly indicate what they were. 1) stairs 2) stream 3) topping the retaining walls.
ReplyDeleteI pretty much glossed over that third project, but I'll gladly cover it in more detail later this winter if anybody is interested.
I continue to be so impressed with your work. Often projects done by homeowners look less than polished, but what you've done is professional quality work.
ReplyDeleteThanks Gerhard! The way I look at it, a professional probably has two things I don't: a lot of experience, and special tools. I have one thing they don't though: the time to go as slowly as I need to figure things out and get the job done. Plus I have high standards. =)
ReplyDeleteDear Alan: Could you come over to my house and fix my back yard? I live in San Francisco -- where are you? I just clicked on through The Pioneer Woman and haven't had time to read all your posts but I'm so impressed with your garden. Just lovely.
ReplyDeleteMarie M: I'd love to, but the commute would be a killer -- I'm in St. Louis. =) Thanks for the kind words!
ReplyDeleteActually, if you have some photos of your yard, email them to me. I'd be glad to offer some suggestions. (Check the "about me" page for my email address)